I took Kitty up to the park to clip her onto the fence. I really wanted to get a shot of the whole quilt.
It was me and seven clothespins against the wind. Isn't she cute? She is all 2 1/2 inch squares, finishing at 2 inches each. Before you get scared, this is totally manageable. It is broken down into 6 rows of six blocks. Each block is six rows of six squares.
We did four blocks each week and it was pretty easy to keep up. It also easily lends itself to chain piecing. I took my time and only had to rip out two rows.
After I got the main quilt top together, I decided to extend it with 4 inch strips along each side, rather than doing more small squares. I like the way it frames the quilt.
I tried not to put like squares next to each other, but sometimes it happened from one block to the next. I decided not to stress over it. Gives it character.
I didn't fussy cut the squares at all, but there were many happy coincidences like this sweet little girl on a swing.
And there is this puppy chasing a ball. I did make sure the text prints were right side up so you could read them. It helped me to keep the blocks oriented correctly too. A bonus.
Some newer fabrics and some very old fabrics are in here. Up close, it is a feast for the eyes.
From a distance, it is awesome. This is my first pixilated quilt ever and I love the technique.
This sweet quilt is a belated birthday gift for my youngest daughter. I'm pretty sure she squealed when I sent her an in-progress picture of it(she's 28).
Breezy Kitty
I quilted in the ditch, every other row along both the horizontal and the vertical. I want it to hold up well to washing and every day use.
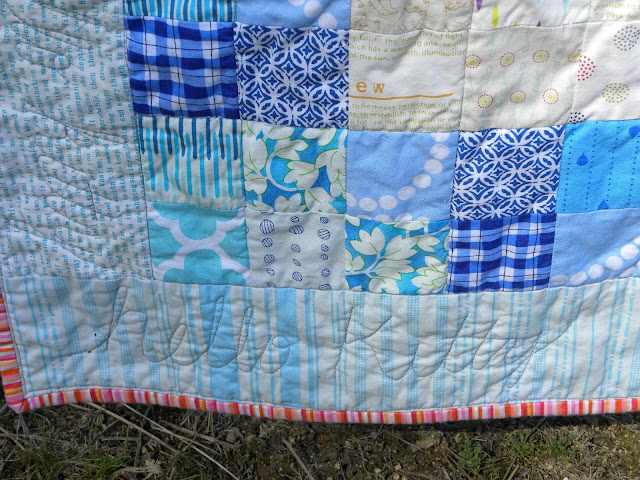
For the borders, I was inspired to write Hello Kitty in cursive all around the edges of the quilt. It is subtle, but you can see it.
Oh, Kitty, I wish I could be there when she sees you for the first time. I know you will be loved.
I am trying to use fabrics from my stash this year as much as possible. Here is the pieced back. I did not buy a single fabric for this quilt.
I am so very pleased with this and I am going to make another one. I know a certain little girl who would love one, as soon as she is old enough to know who Hello Kitty is.
The binding is a Quilter's Candy stripe from Connecting Threads. I love the way it makes the edges look. It also matches the pinks in the quilt. See the hearts there? All my love going out with this.
This was a very happy project. See you soon.Going to link up with Crazy Mom Quilts for Finish it Friday.


6 comments:
This is sew F.A.B.U.L.O.U.S. and I love it. It looks far too complicated and time consuming but as a gift of love for your daughter it is very well worth the Labor of Love. I have been thinking of you and am happy to see you posting. Creative Hello Kitty Bliss...
ADORABLE!!
Kitty looks cute!
This quilt is gorgeous!! I just love it!! Great finish!!
The hopscotch fabric is so cute! It makes me sad that I did not take more time to look at all the little details before I shipped it to little sister. I really love the binding, also. Such a fun quilt. One of my favorites.
Did you happen to print out or save the instructions for the QAL? The site is down and Sukie (Amy) is not responding to me. You would be a lifesaver if you had anything to pass on- I already cut all of my squares and have two rows and two blocks completed. Thanks!
Post a Comment