The sun is shining and it looks like it's going to be a warm day...72 is the forecast high. So this is the day to get the yard and the leaves under control. It might be the last, best chance.
I do have a couple of small things to show you. More sewing will hopefully occur tomorrow. I am in Christmas sewing mode now, so it is harder to show pics, since they are secret. Here we go:
These are my November blocks for my Sunday Morning Quilts Bee. Purple is the color this month.
And since I was in a 'get it done' mode, I decided to bang out December too and have it all finished.
December's color obviously was pink. I can't wait to see them all together and figure out placement.
These will go off in the mail this week. Yay!!! And one more thing I have to share is this:
I have been wanting to try Quilt As You Go and I had some Heather Ross fabric in small-ish pieces that I bought on Etsy a while back that I have been wanting to use, so I played with this. I added some stuff from my stash and I like it so far. My plan is to make more of these quilted blocks and then join them together. I will show them as I do them.
Have a happy Sunday all.
I am a quilter. I am a wife, mother and grandmother. I am Grammie Q...the Grammie who Quilts. I also love to bake, cook and read.
fabricologist
Sunday, November 11, 2012
Tuesday, November 6, 2012
U R Priceless...indeed!
I love the name of this blog hop. Very catchy! If you missed the first day, click on the button up on the right and you can see Monday's schedule. It is worth a look. They are awesome. These little coin purses are so much fun to make and I knew one wouldn't be enough. Here we go...
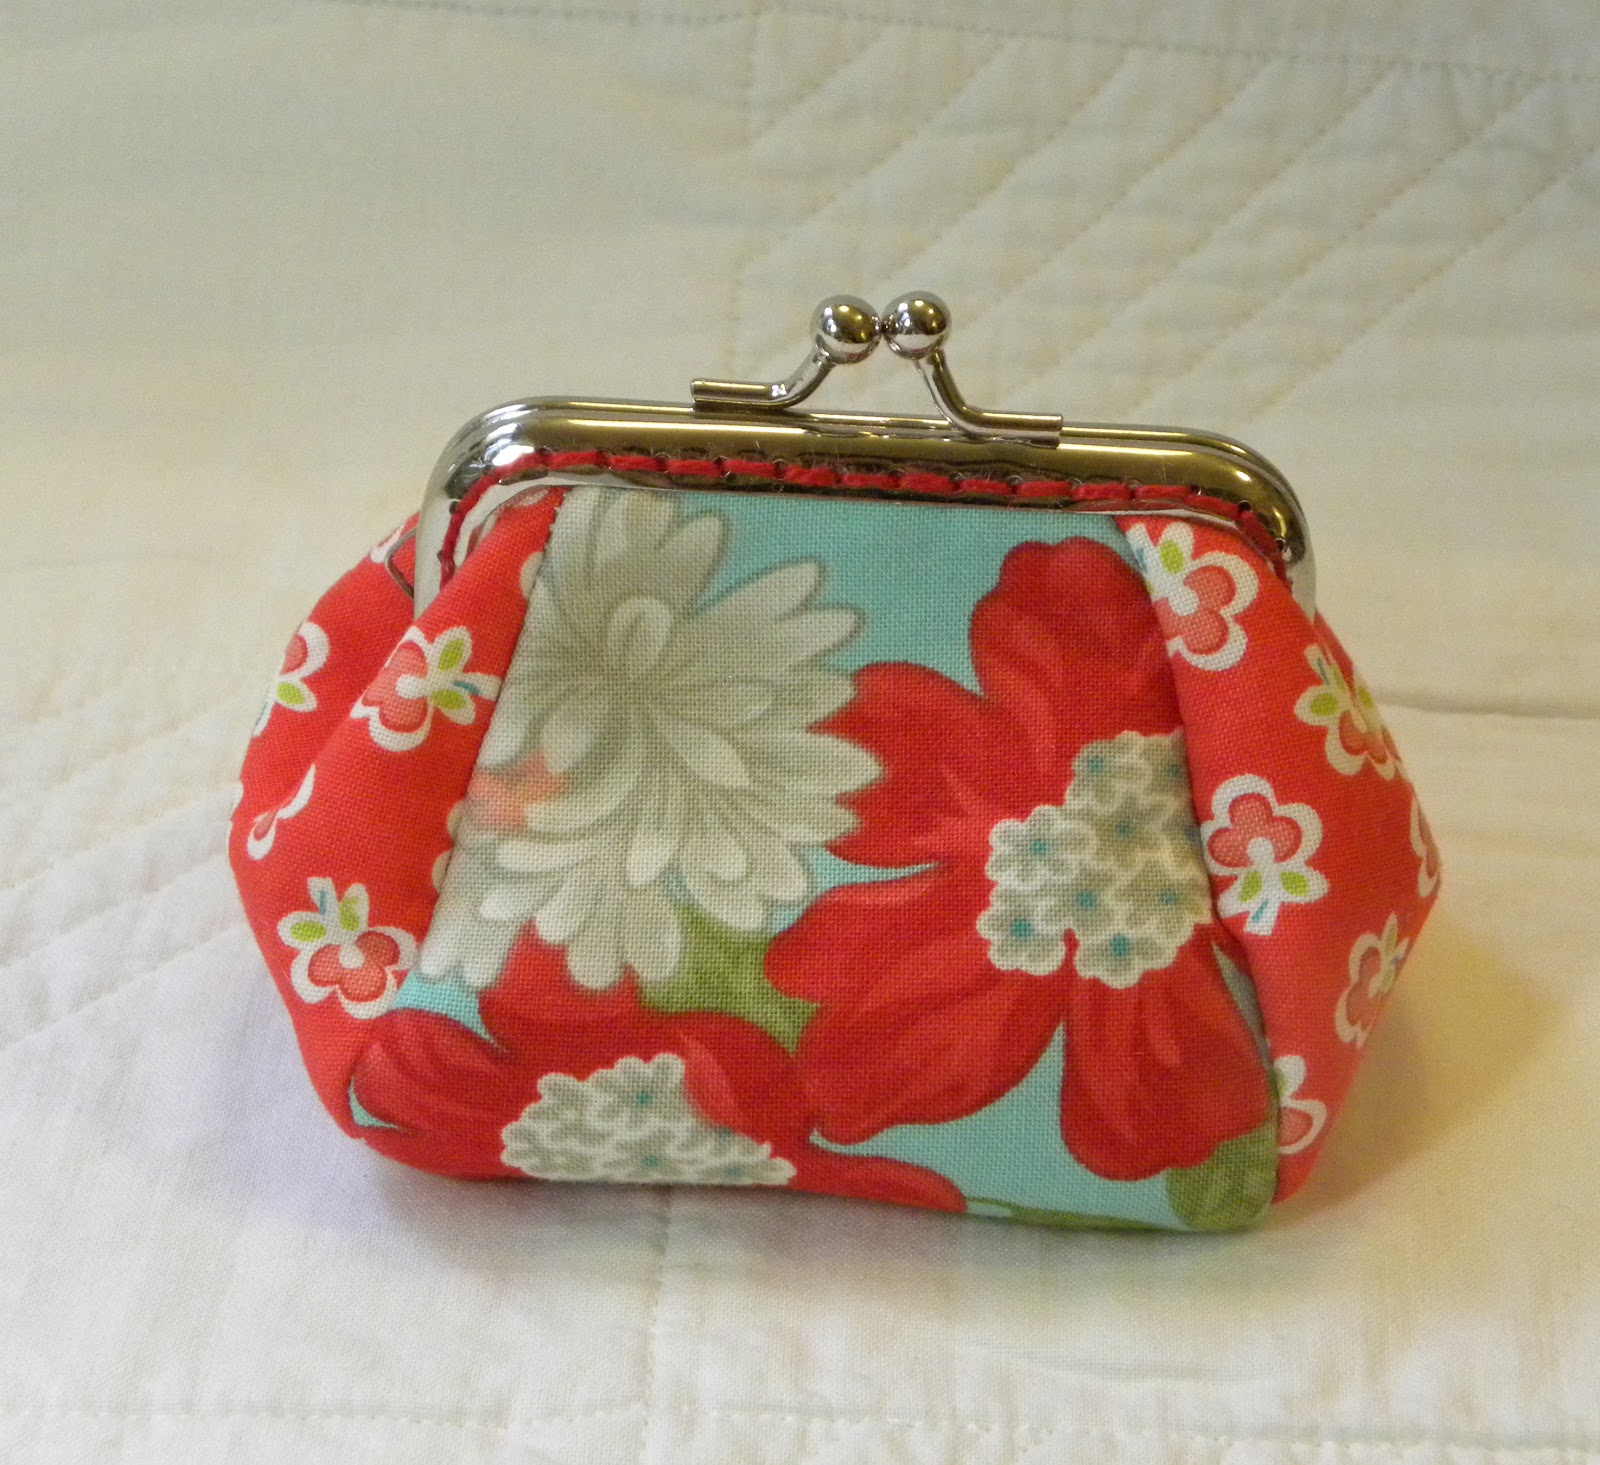
This was my first try. It was sew easy, almost too easy if you know what I mean. I used Vintage Modern by Bonnie and Camille. I love that line. I fussy cut a bit for the front and back and stitched the top on with red Pearl cotton.
I am very happy with the way this one turned out. The red print on the sides is one of my very favorites in the whole collection.
I lined the inside with the pink hounds tooth check. You can see a bit of the stitching inside.
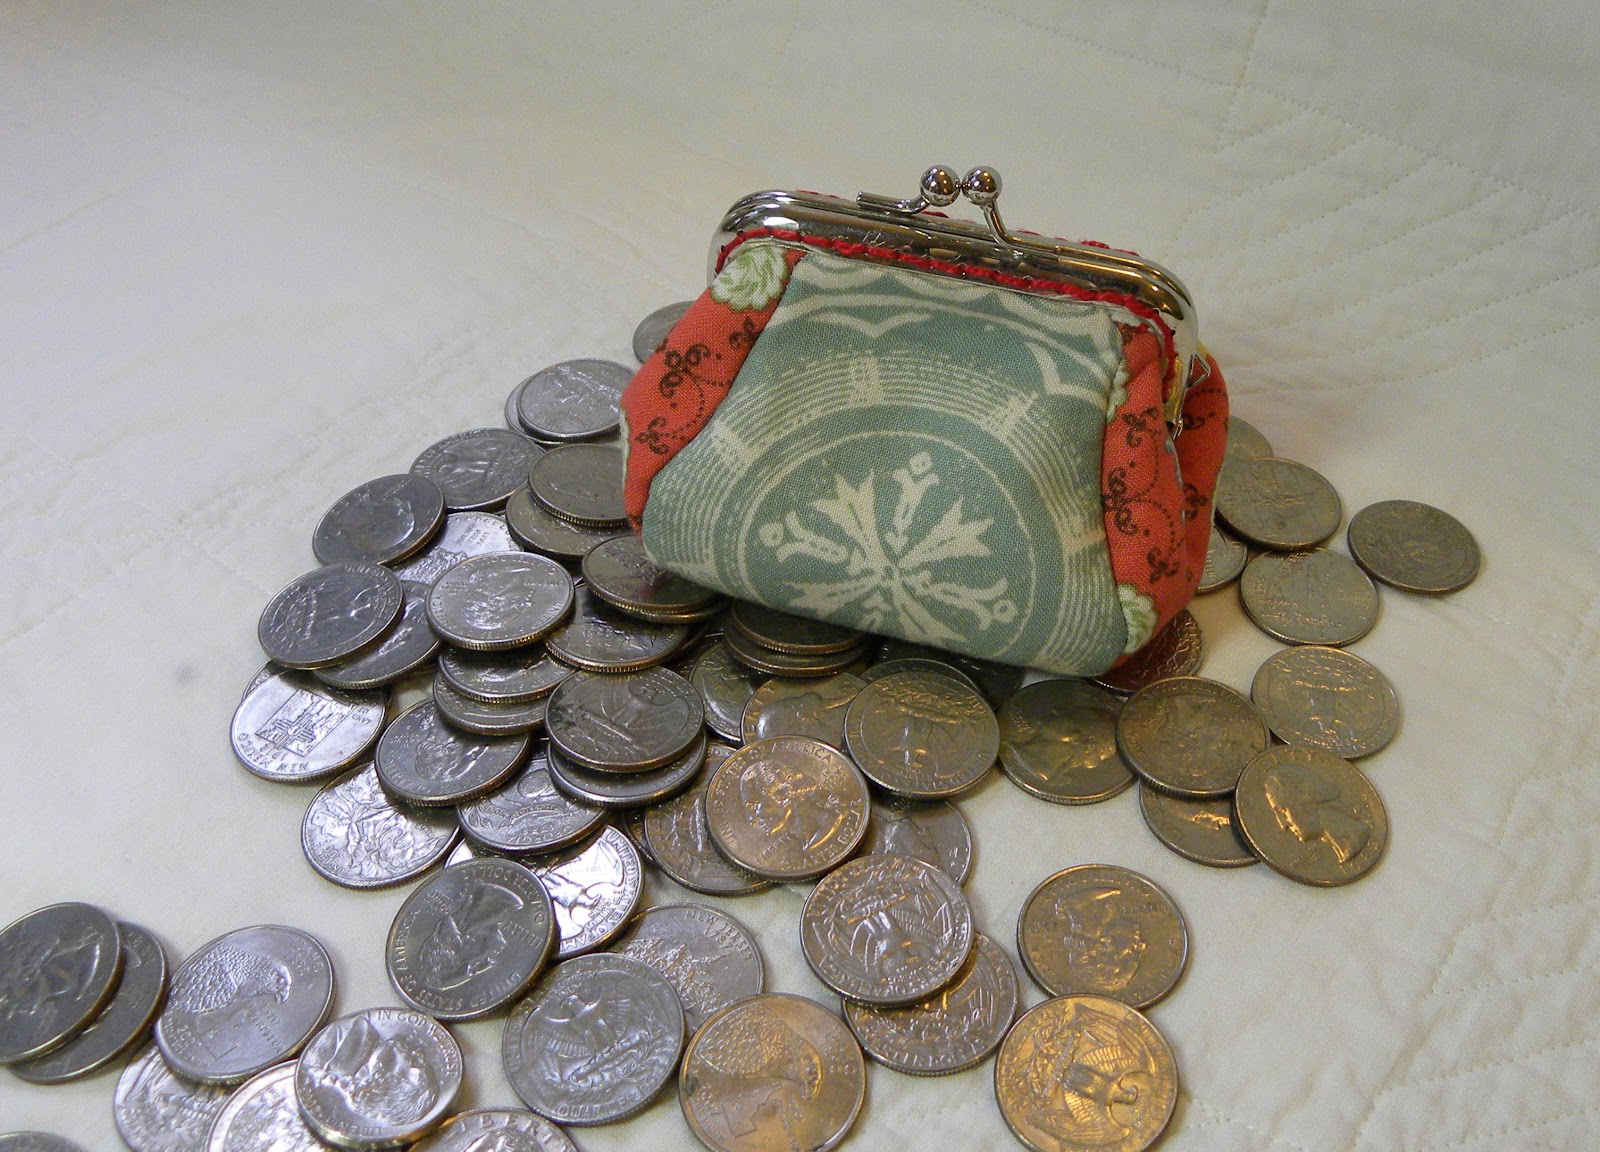
And it is a coin purse after all, so I wanted to see how it performed. Pretty good, don't you think? You would be amazed at how many coins it holds!
This is the second one I made. I used Odds & Ends by Julie Comstock. I love the fabric, but I didn't like the way it turned out as much as the first one. I think it seems washed out in comparison.
And I tried crimping the top a bit to help hide the stitching inside. It didn't really work. It only made the clasp not really go together very well. So that one was a bust.
But I couldn't stop there. I had a charm pack of Oh Deer! I love these little tiny deer! I cut the front, back and sides out of 4 different colors. I Love this one too.
For the inside I used bright orange with white dots. I am still in love with polka dots.
And yes, I had to put the coins in this one too. In case you are wondering, this is a handful of small change topped with 2 1/2 rolls of quarters. I had it in my head to photograph this way and I must say, it is about as I imagined it. Such fun. I still have one more frame, but haven't decided what fabric to use on it yet.
Now go and see all the other wonderful coin purses today's fabulous ladies have made. Thanks to Madame Samm and Katherine for another great hop. It is truly a joy to participate in these. Here are the other Ladies for today:
Day 2 - Nov.6th
The Crafter's Apprentice
Jane's Fabric and Quilts
Rosemary B
Why-Knot-Kwilt
Random Thoughts..do or "di"
Mary T.
Supermom No Cape
Lily Pad Quilting
.Quiltscapes.
Stitch, Stitch, Stitch
Rose Creations
The Treehouse
Gracie Oliver Arts
Quilting Prolifically
Stekje
Grammie Q's (you are here)
See you again soon.
This was my first try. It was sew easy, almost too easy if you know what I mean. I used Vintage Modern by Bonnie and Camille. I love that line. I fussy cut a bit for the front and back and stitched the top on with red Pearl cotton.
I am very happy with the way this one turned out. The red print on the sides is one of my very favorites in the whole collection.
I lined the inside with the pink hounds tooth check. You can see a bit of the stitching inside.
And it is a coin purse after all, so I wanted to see how it performed. Pretty good, don't you think? You would be amazed at how many coins it holds!
This is the second one I made. I used Odds & Ends by Julie Comstock. I love the fabric, but I didn't like the way it turned out as much as the first one. I think it seems washed out in comparison.
And I tried crimping the top a bit to help hide the stitching inside. It didn't really work. It only made the clasp not really go together very well. So that one was a bust.
But I couldn't stop there. I had a charm pack of Oh Deer! I love these little tiny deer! I cut the front, back and sides out of 4 different colors. I Love this one too.
| Here is the other side. |
For the inside I used bright orange with white dots. I am still in love with polka dots.
And yes, I had to put the coins in this one too. In case you are wondering, this is a handful of small change topped with 2 1/2 rolls of quarters. I had it in my head to photograph this way and I must say, it is about as I imagined it. Such fun. I still have one more frame, but haven't decided what fabric to use on it yet.
Now go and see all the other wonderful coin purses today's fabulous ladies have made. Thanks to Madame Samm and Katherine for another great hop. It is truly a joy to participate in these. Here are the other Ladies for today:
Day 2 - Nov.6th
The Crafter's Apprentice
Jane's Fabric and Quilts
Rosemary B
Why-Knot-Kwilt
Random Thoughts..do or "di"
Mary T.
Supermom No Cape
Lily Pad Quilting
.Quiltscapes.
Stitch, Stitch, Stitch
Rose Creations
The Treehouse
Gracie Oliver Arts
Quilting Prolifically
Stekje
Grammie Q's (you are here)
See you again soon.
Friday, November 2, 2012
Flannel Weather
It truly is flannel weather now. Not only wearing it, but sewing with it. I spent last weekend making PJ pants for the boys. I used the Oliver + S pattern for sleepover pajamas that I had used last year for their Christmas PJs. The two older boys are taller, but still skinny, so I could use the same size and just add a couple of inches to to the length. For baby B I just moved up to the 9-12 month size so hopefully he can wear them a bit longer. We'll see.
Here they are...
These are the two pair for baby B. I am still using Amy Butler's pattern from Little Stitches for Little Ones. It is the pattern for the Kimono Pajamas bottoms.
For some perspective, here are baby B's next to big brother V's pajama pants. This is the first thing I have made for the brothers to dress alike. Can't do it often, but this is too cute not to.
And here are cousin J's, looking just like the little orange pair above. These were pretty simple to make, and like anything, the more you make, the easier it gets.
After all these, I had a ton of scraps and one good size piece of the light green with the little alligators on it, so I decided to use them up for this:
I sewed a bunch of the scraps together until it was the same size as the larger piece of flannel. I didn't take a picture of the back, but it was just one big piece. I stitched the edges together with the right sides together, turned it right side out and edge stitched the top all around the edges.
Then, I shadow quilted along side each of the joints on the top to anchor the two layers together. It is a great weight for the baby and the size it perfect for wrapping him up in the car seat. It measures about 40 x 30 inches. I would like to make another of these, but I need more flannel first!
My flannel all came from Connecting Threads, and I pre-washed it before sewing to minimize shrink.
I hope you have a great weekend, and I will see you next week when the U R Priceless blog hop begins. It starts on Monday and you can find the schedule by clicking on the button above on the right. It is hosted by Sew We Quilt and Madame Samm. I hope to see you there. My day on the hop will be Tuesday.
Until then, happy quilting.
Here they are...
These are the two pair for baby B. I am still using Amy Butler's pattern from Little Stitches for Little Ones. It is the pattern for the Kimono Pajamas bottoms.
For some perspective, here are baby B's next to big brother V's pajama pants. This is the first thing I have made for the brothers to dress alike. Can't do it often, but this is too cute not to.
And here are cousin J's, looking just like the little orange pair above. These were pretty simple to make, and like anything, the more you make, the easier it gets.
After all these, I had a ton of scraps and one good size piece of the light green with the little alligators on it, so I decided to use them up for this:
I sewed a bunch of the scraps together until it was the same size as the larger piece of flannel. I didn't take a picture of the back, but it was just one big piece. I stitched the edges together with the right sides together, turned it right side out and edge stitched the top all around the edges.
Then, I shadow quilted along side each of the joints on the top to anchor the two layers together. It is a great weight for the baby and the size it perfect for wrapping him up in the car seat. It measures about 40 x 30 inches. I would like to make another of these, but I need more flannel first!
My flannel all came from Connecting Threads, and I pre-washed it before sewing to minimize shrink.
I hope you have a great weekend, and I will see you next week when the U R Priceless blog hop begins. It starts on Monday and you can find the schedule by clicking on the button above on the right. It is hosted by Sew We Quilt and Madame Samm. I hope to see you there. My day on the hop will be Tuesday.
Until then, happy quilting.
Monday, October 29, 2012
Let Them Eat Cake
As the storm swirls around us here, not too bad, I want to share my weekend finish with you. Remember these?
I pieced these for the Texting While Sewing contest that Amy Friend hosted this summer. Well, I finally quilted and bound them and I want to show you how nice they turned out. I made them into two wall hangings.
The tiered cake is one hanging all by itself. I added two more borders to the original one and binding was Kona pink...can't recall the exact color.
I pebble quilted the white background and stitched in the ditch around the cake and the stand, as well as around the borders. I love the way the pebble quilting mimics the dots on the cake.
The other two blocks, I paired up for this wall hanging. I gave it the same treatment, two more borders, this time using a lighter Kona pink for the border and the binding.
Keeping with the theme of the background quilting mimicking the cake, I did roses on this one...
and straight lines on this one. More stitching in the ditch around the cakes, stands and borders too.
I am so pleased with how they turned out. I hope you like them. They are going to go live on the dining room wall at my daughter's house. She was the one who came up with the concept originally, so they kind of need to go to her. I can go visit them.
Enjoy the rest of your day.
I pieced these for the Texting While Sewing contest that Amy Friend hosted this summer. Well, I finally quilted and bound them and I want to show you how nice they turned out. I made them into two wall hangings.
The tiered cake is one hanging all by itself. I added two more borders to the original one and binding was Kona pink...can't recall the exact color.
I pebble quilted the white background and stitched in the ditch around the cake and the stand, as well as around the borders. I love the way the pebble quilting mimics the dots on the cake.
The other two blocks, I paired up for this wall hanging. I gave it the same treatment, two more borders, this time using a lighter Kona pink for the border and the binding.
Keeping with the theme of the background quilting mimicking the cake, I did roses on this one...
and straight lines on this one. More stitching in the ditch around the cakes, stands and borders too.
I am so pleased with how they turned out. I hope you like them. They are going to go live on the dining room wall at my daughter's house. She was the one who came up with the concept originally, so they kind of need to go to her. I can go visit them.
Enjoy the rest of your day.
Friday, October 26, 2012
Time for the Quilt Blogger's Festival
It's time again for the Quilt blogger's Festival. I love all the inspiration that comes from the participants of this festival. I have gotten some seriously great ideas from looking at some of the entries. So for this go round, here is my submission:
I started this quilt last summer as part of Amanda Jean's 36 Patch QAL. No this was long before Sunday Morning Quilts came out. I had been reading her blog for about 6 months or so and just loved her style. I had never don a QAL, so I was anxious to try one and see what it was like.
I started pulling out scraps an small bits to find pairs for each block. Now I am a sort of matchy matchy girl when it comes to fabric for my quilts, but with this, I kinda let go a bit. I selected to fabrics for each 36 patch square, without regard for how it would look with the other squares. I worked hard to stay caught up, but still fell behind.
I finally finished the squares last fall I think. Then I finally came up with the layout and sewed them all together. I was surprised to find out how much I liked it. Then, another stumble...how to back it? By now it was spring. I wanted to keep the scrappy theme, so I took all the leftover strips from the front and started piecing the back. About half way through, I realized the "huge pile" was smaller than I thought. So I stopped again.
Then one day, I just grabbed the half done back and added a few larger pieces of fabric that had been sitting in my stash, some for years. The back was done. Then I folded it all up and it sat some more.
This summer, I finally bought some batting. I had been on a "sew only from the stash" diet almost all summer, and that included batting for awhile as well. I didn't have nearly enough scraps of batting for this baby.
It took me several sessions at my machine to get it done. I love each block for itself and I even love the whole thing together now. It took some getting used to, I must admit.
She looks good in the autumn sunshine, doesn't she?
With all that color, I decided to use black and white for the binding. I had a jelly roll of Summersville and I pulled all the black and white out. I love the way it finished off this beauty.
Now the stats:
Quilt measurement is 70" x 70"
Quilted by me on my Bernina
Category-Favorite Scrap Quilt or Favorite Throw Quilt
Number 38
Now off to see everyone else's quilts!!
I started this quilt last summer as part of Amanda Jean's 36 Patch QAL. No this was long before Sunday Morning Quilts came out. I had been reading her blog for about 6 months or so and just loved her style. I had never don a QAL, so I was anxious to try one and see what it was like.
I started pulling out scraps an small bits to find pairs for each block. Now I am a sort of matchy matchy girl when it comes to fabric for my quilts, but with this, I kinda let go a bit. I selected to fabrics for each 36 patch square, without regard for how it would look with the other squares. I worked hard to stay caught up, but still fell behind.
I finally finished the squares last fall I think. Then I finally came up with the layout and sewed them all together. I was surprised to find out how much I liked it. Then, another stumble...how to back it? By now it was spring. I wanted to keep the scrappy theme, so I took all the leftover strips from the front and started piecing the back. About half way through, I realized the "huge pile" was smaller than I thought. So I stopped again.
Then one day, I just grabbed the half done back and added a few larger pieces of fabric that had been sitting in my stash, some for years. The back was done. Then I folded it all up and it sat some more.
This summer, I finally bought some batting. I had been on a "sew only from the stash" diet almost all summer, and that included batting for awhile as well. I didn't have nearly enough scraps of batting for this baby.
It took me several sessions at my machine to get it done. I love each block for itself and I even love the whole thing together now. It took some getting used to, I must admit.
She looks good in the autumn sunshine, doesn't she?
With all that color, I decided to use black and white for the binding. I had a jelly roll of Summersville and I pulled all the black and white out. I love the way it finished off this beauty.
Now the stats:
Quilt measurement is 70" x 70"
Quilted by me on my Bernina
Category-Favorite Scrap Quilt or Favorite Throw Quilt
Number 38
Now off to see everyone else's quilts!!
Sunday, October 21, 2012
Traveling Stash Giveaway
Here it is, the Traveling Stash Box number 2. I have been periodically checking in to see where they all were and what was available. I thought it would be fun to have one come to me. And it is fun. Lots of interesting things in this box.
This is what was in the box when it came to me. Lots of fabric, a stack of patterns, a zip bag of notions and a few charm packs. I perused it all a couple of times. My thoughts in selecting was to only take things I really thought I would use. My own stash is large enough, and I didn't want to just pick things that would sit around here. So this is what I took:
Two large-ish pieces of fabric and several smaller ones, including a Santa piece that looked very cute and vintage-like. There were several more Christmas themed pieces in the box as well. And one charm pack of vintage sheet charms.
This is what I added to the box:
Four 1+ yards pieces of well loved fabric that I never could figure out how to incorporate into projects, several smaller pieced including a ladybug on pine branches piece, a Charm pack and a collection of 3 inch zippers that I bought, intending to make small coin purses, which I never did.
If you would like to have this collection of lovely stuff come to you, leave me a comment here on this post. Here are the rules:
RULES:
Contest Closed
Good luck. I will leave this open until Friday October 26, at which time I will pick a winner.
Winner will be posted here and contacted by email.
See you soon.
Edited to add: And the winner is...Lucky 13 SewCalGal Send me your mailing address and the Traveling Stash will be off to you next week!!
This is what was in the box when it came to me. Lots of fabric, a stack of patterns, a zip bag of notions and a few charm packs. I perused it all a couple of times. My thoughts in selecting was to only take things I really thought I would use. My own stash is large enough, and I didn't want to just pick things that would sit around here. So this is what I took:
Two large-ish pieces of fabric and several smaller ones, including a Santa piece that looked very cute and vintage-like. There were several more Christmas themed pieces in the box as well. And one charm pack of vintage sheet charms.
This is what I added to the box:
Four 1+ yards pieces of well loved fabric that I never could figure out how to incorporate into projects, several smaller pieced including a ladybug on pine branches piece, a Charm pack and a collection of 3 inch zippers that I bought, intending to make small coin purses, which I never did.
If you would like to have this collection of lovely stuff come to you, leave me a comment here on this post. Here are the rules:
RULES:
- Be an active blogger. Post about receiving and the giveaway on your blog in a timely manner.
- There is a note in the box that logs where the box has been. Please add your info and place the note back in the box.
- There is a list of Rules and Guidelines in the box. Please read and follow these and return the list to the box.
- You may take anything you like from the box. Just replace every item with comparable quilt shop quality items equal to the amount taken. See guidelines below.
- Ship the box to the next person in a reasonable amount of time.
- Due to the amount of postage shipping is only within the USA.
Contest Closed
Good luck. I will leave this open until Friday October 26, at which time I will pick a winner.
Winner will be posted here and contacted by email.
See you soon.
Edited to add: And the winner is...Lucky 13 SewCalGal Send me your mailing address and the Traveling Stash will be off to you next week!!
Saturday, October 20, 2012
Winner Winner !
I had to work all day and am now feeling a cold coming on, so no witty post today, but I used the Random Husband Numerator to pick a winner for the Charming Travelers giveaway. The winner is Dana, of Old Red Barn Co. I sent you an email Dana.
I will be back tomorrow with a proper post for the Traveling Stash Giveaway. Stay tuned.
Subscribe to:
Posts (Atom)