fabricologist

fabricologist

Sunday, October 6, 2013

Progress

It's been a busy week, with not as much sewing time as I would like. But anyway, I did get three rows put together in my MSBHQAL.  Here they are...

 It is a bit too wide for me to hold up properly.  But then it is a big quilt so I had to lay it down, which is how I take many pics.
It was overcast, but a bright sky. Good for pictures today. This is half of the quilt. Three more rows to go.  I have decided to put a wide, grey border around it to get it to the size I need.  I am thinking 6 inches, but we will see when I try it on the bed.

In other sewing I made some pants for the grandsons.  This is the pair I made for V.

 I have been making pants for him for a few years using a style and technique I found on Dana Made It. She has lots of tutorials for boy and girl stuff. Lots of great easy ways to make pants.
 This time, I lined them, since it's fall and cooling down and the fabric was pretty thin. It is the railroad denim that I bought awhile ago. I loved the idea of the dog tag.  The lining is Pooches and Pickups by Laurie Wisbrun.
 I made the pockets a bit deeper this time since he is getting older and needs "real" pockets.
Here is the lining. Should keep him cozy and warm and once washed, they will be oh so soft. The elastic only goes across the back so the front is flat. A more grown up look.  I made a pair of Quick Change Trousers for baby B out of the same two fabrics, but forgot to get pictures before I sent them to his house.

It's a nice change of pace to sew clothing periodically.  Talk to you soon.

Tuesday, October 1, 2013

So Apparently You Can Teach an Old Dog New Tricks

So I needed a 12.5 inch square ruler to square up my MSBHQAL blocks, but didn't have one. I thought that, like always, I would make do and try to square up using what I had. I even asked Molli how to do it, if it was possible, without the square ruler. He was so sweet and sent me a tutorial that he worked out. But then I started to worry about it. A lot. So I caved. I checked around and priced them in lots of different places. And I ended up buying one at my LQS.  And this is what I learned:

 This is one of my "squares" before trimming. I tried to line it up within the 13 inch lines. It was very wonky. I had thought it looked square, but it was an illusion.
 See how it goes off the edge here?
 ...and here?
 ...and not very straight here either.
 Then, I apply the 12.5 inch square ruler. One of the things it does is to flatten out the block so you can see it in its true form.
 Look at all that wonky overhang! It's certainly not even on any side.
 This side looks kinda even doesn't it? But not really so. Check out the next picture.
 I hope you can see how much skinnier the bottom of this string is than the top. Many of my trimmings ended up that way.
 And here it is, all crisp and trimmed up.  All 30 of them are now done. They look awesome, even if I do say so myself. I guess I should have gotten the ruler long ago. I have struggled for so long with this issue. Some things are definitely worth having. I know I will get lots of use out of this.
 Here are the first three sewn together. I am loving the way they look!!
 Here is the layout for the whole thing. Each corner has a completely green block in it. This is going to be a great quilt.
Here is inspector O'Malley, making sure everything is okay. He approves. He will be happier when it is quilted and he can curl up on it.

Tuesday, September 24, 2013

Molli Sparkles QAL Squares...DONE!

When I first thought to join the MSBHQAL, I thought I would do a lap size quilt. Then, I pulled fabrics and thought about bed sized quilts. Then I pulled more fabrics because I didn't have enough for a bed sized quilt. Now the blocks are done.  All 30 of them using 18 different fabrics. Whew...

 This is the entire stack of 30 blocks. I love the look and feel of it in my hands. I took them off the design wall and took them outside on the deck to photograph. What a difference it makes in natural light. The colors pop, just like in real life!
 There are 4 green blocks; one will go in each corner. That way, things stay a bit balanced.
 Each block is a bit different. Each has 6 different fabrics in it. There is some Sweetwater's Reunion, some Squared Elements (so soft) Pearl Bracelets (so versatile), Bonnie and Camille's Vintage Modern. Picking the fabrics for this was so much fun!
 This is one of my favorite blocks. I can't really pick just one, though. Each one has lots to offer the eyes. I am really excited to see them all together.
But that process won't begin until next week.   So until then, happy quilting. Have a great week.

Sunday, September 22, 2013

Sunday Something

I have spent most of the week making a block or two a day for the MSBHQAL so I didn't feel there was anything post worthy. Out of 30 blocks I have 25 done, 5 to go.  But I was also able to get a couple of other things done as well.

 I thought I would start with smaller and work my way up, size-wise through the 12 quilts that need quilting.  This is the smallest one. The small version of the Briar Rose quilt that I made from scraps.
 I found a small piece of starry Christmas fabric leftover from something years ago. Bound with some leftover Sunkissed swirly print.
 This one has long been a fave. I pieced this one about 5 or 6 years ago when I had an idea to turn my quilting into some sort of a business. I was going to try making baby quilts from my scraps (of which there are tons). I made 4 different quilt tops before I decided that was too much work and it wasn't what I wanted to do.
 It hung in the closet all these years. Two of the others have long been quilted and donated to charity and the third I quilted and kept. I couldn't bear to part with it in the end.
 I found a big hunk of blue in my stash for the back and the binding stripe is a Quilter's Candy from Connecting Threads.  Quilted in swirly curlycues.
I love how it turned out. It's about 42 inches almost square. Not sure yet where it will end up. So that's 2 down, 10 to go. Yay me!!  Have a great week. See you soon.

Friday, September 13, 2013

Remembering Grandma Ruby

I had to take my Bernina in to have her yearly tune up. But, I am right in the middle of the MSBHQAL, so I couldn't be without a machine. I came up with a plan...I wanted to get my grandmother's Singer featherweight ready to sew. It has been a few years since she was used, and the last person to use her, was my youngest daughter. She even moved her to the west coast.

The first thing I did was to find an on line source for parts. I knew she needed to be oiled and greased and a lightbulb. Then I noticed the wire on the pedal was frayed, so I found a place that sold new foot pedals too. I waited rather impatiently for all these items to arrive.

 This is the original foot pedal that came with the machine. I don't know when it was purchased, but it was manufactured in 1948.  I am keeping this pedal for now. I can't bear to throw it away.
Here is the new foot pedal that I purchased for $18. A fair price if you ask me and it works like a champ.

 So what has this to do with Grandma Ruby? Well, obviously, this was her machine. It is the only sewing machine I remember her ever using.  She was a professional seamstress and for a number of years, when she first lived with us, she worked at a drapery shop.
 She was very good at making clothing too. She and my mother whipped out lots of clothes and mended many other items over the years. When I wanted to learn to sew, she taught me. This is remarkable to me now, as I remember she was not a patient person and she would often get "an attack of nerves" thet sent her to bed, sometimes for days.
 We made a small pink skirt for a doll I had. I think i was about 10 at the time. She showed me how to do everything and then let me do it. That skirt was pleated, had a waist band and a snap, and had a hem put in by hand, by me, with an invisible hem stitch that she taught me. "Only pick up two or three threads of the fabric and it won't show on the top side." Did I mention she was meticulous.
 After that I sewed lots of clothes for me and my sisters on this machine. All through high school. When I went off to school and later moved out on my own, I had no machine for a while, then I won one in a drawing. I used it for a bit, but it wasn't great and I don't remember the brand or model.
 Somewhere along the way, I got this machine given to me by my mother. I remember sewing clothes for my daughters on it when they were small. I have taught all my daughters how to use it, and some went on to sew more, some, not.
 But I am so proud that 4 generations of my family have used this machine. I have a big Bernina now, but I have enjoyed using this little one so much. The memories it brings back. I think I will continue to piece on it.  Bernina can do the quilting part.
 I hope that somewhere, Grandma Ruby looks down and smiles and is proud of the legacy she left to us.
 Thanks, Grandma Ruby, for giving me the best gift ever, the love of sewing. It sustains me more than you can ever know.
And she still sews a pretty straight line too. Thanks for stopping by. See you soon.

Tuesday, September 10, 2013

Sew Let's Pin It

Today is the first day of the Pin It blog hop. I have no doubt that this is going to be one of the most fun blog hops yet. Pin cushions!! Thanks, once again to Madame Samm for coming up with such a great idea for a hop. Kristin at Meadowbrook is our head cheerleader for this hop and she is doing a great job keeping us all up on what to do and where to be.

So without further ado, here are my submissions for today's hop:

 I have been wanting to make a strawberry for some time now. this one is stuffed with polyfil only, so is quite light weight. The black "seeds" are pins stuck in all the way.
 A loop of green ribbon for the stem, also gives it something to hang up by if so desired.
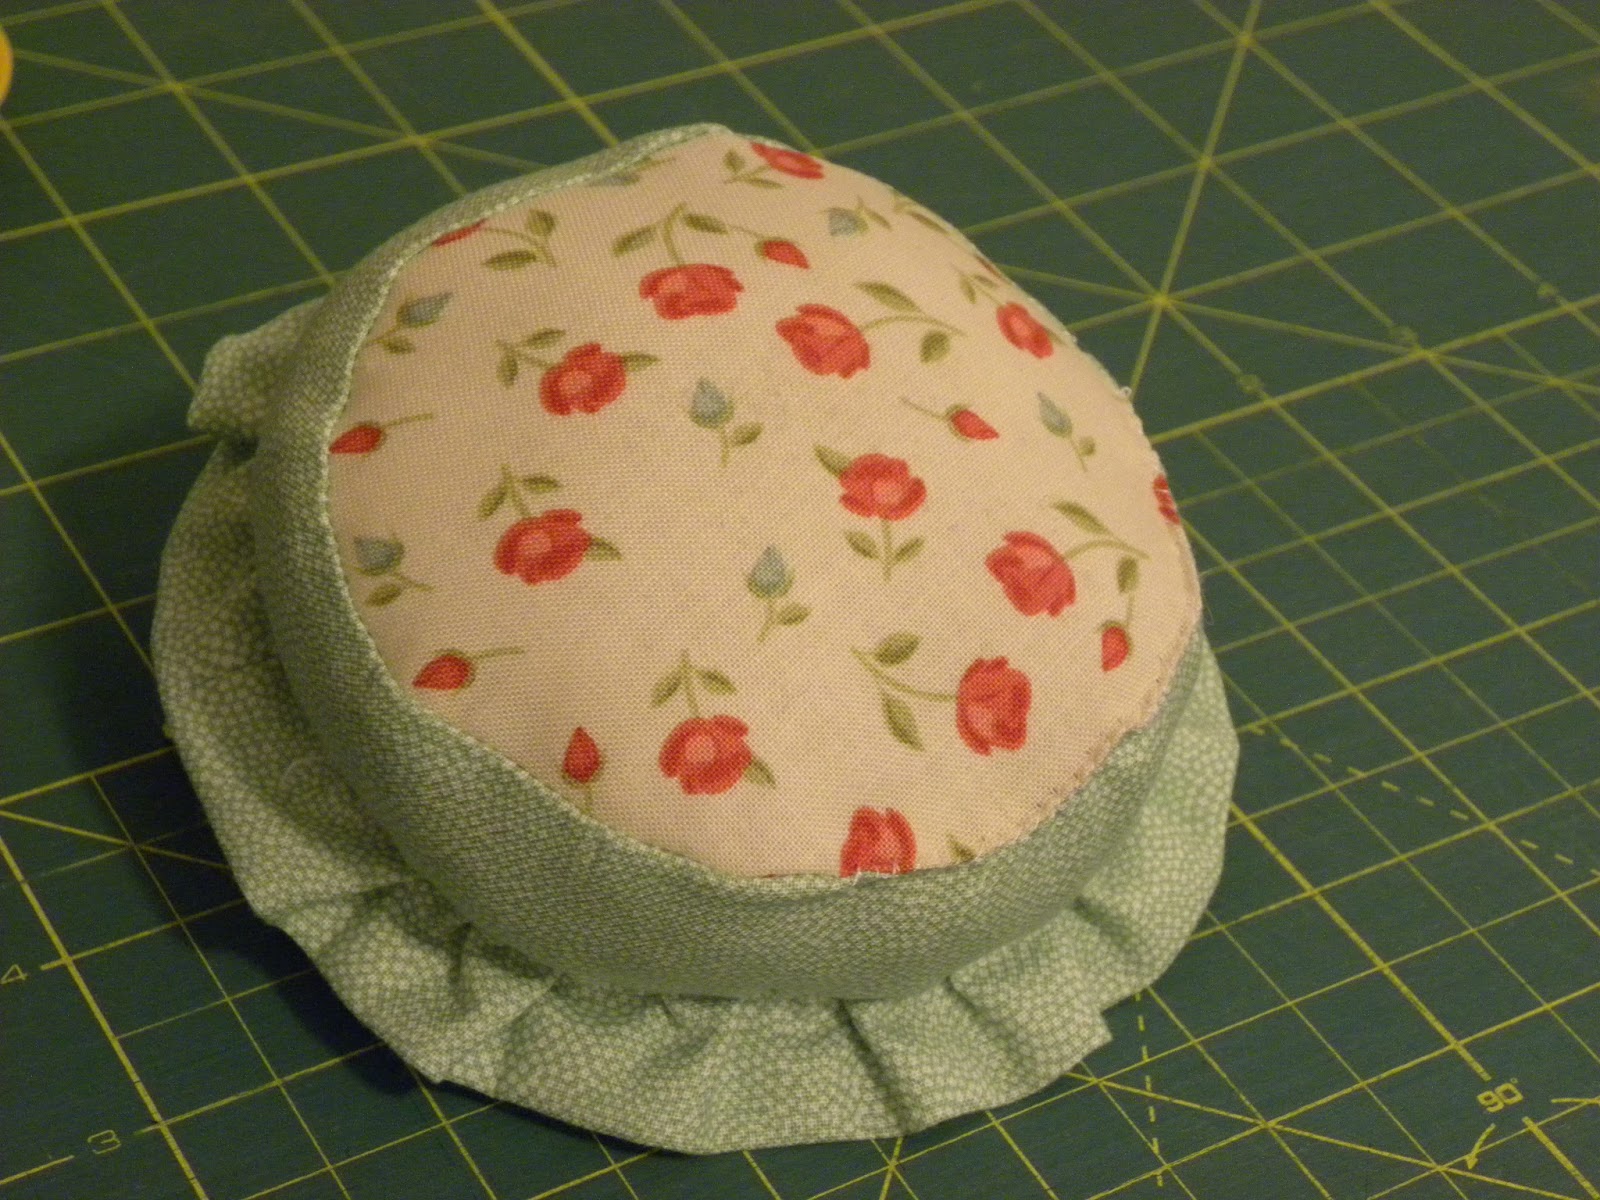
 I also wanted to make something sweet and delicate. I found a couple of layer cakes and went through them to find this sweet floral and the pale green. Taking a page from Madame Samm's book, I fashioned a ruffle. This too is only filled with polyfil.  The small flower and leaf pins I made with clay and then baked them to harden.
       This is the bottom. Not really flat, but it sits quite nicely anyway.
                                  One more shot of the sweetness.
 Now this one is my favorite. I am a baker by profession and I wanted to make something that was out of the ordinary and reflected my baking. I thought of cookies and cupcakes, but all those food items have been done.  So I made a stand mixer! I put dried beans in the base to give it the weight to stand up. The numbers are a selvedge and a pin for the switch.
 I took some jewelry wire to make a whisk for the bowl and stuck a strawberry pin that I made on top of the bowl.
 My daughter was teasing me that from this angle it looks like a dinosaur. Well, I guess it kind of does.
But I still love it anyway.  And this concludes my show of pin cushions. Go check out all the other ladies who are on for today. And thank you for stopping by.
A very large and gracious thank you to everyone who stopped by and looked or commented on this post. With almost a hundred comments, I can not reply to all. I am so happy that my work was so well received and brought smiles to your faces.

September 10
Meadowbrook