fabricologist

fabricologist
Showing posts with label Camille Roskelly. Show all posts

Monday, May 10, 2021

Swoonin Again

Many years ago, when the pattern for the Swoon quilt was released, I jumped in with everyone else and made a swoon quilt. (Pattern by Camille of Thimble Blossoms) A couple of years ago, I bought the Swoon 16 pattern for 16 smaller blocks, and made one for a friend in need. My sister has long loved this quilt pattern and wanted one, so I finally caved and said I would make one for her. The only condition I put on it was that we would have to find a quilter to quilt it. She wanted 16 full size (24") blocks so it would drape all the way down on her bed. It is about 104 inches square.


 She agreed and we set about the project. I had her go on line to find the fabric she wanted. I told her the best way was to choose a fat quarter bundle. That way it would already be fully coordinated. She knows how to choose colors she likes, but having to choose that many fabrics is daunting. This way, there would be enough fabrics for 2 per block, times 16. She knew she wanted a creamy color for the background. That was easy. We used my Kona color card once the fat quarter bundle arrived, and chose the perfect cream color.

Now, if you have never made one of these quilts, there are 81 pieces in each block. It very definitely is a precision piece of work. I would cut the fabrics for 2 blocks on one day. The following two days, I would sew a block each day. I did have to use the seam ripper a couple of times, but over all, it worked out fine. I have my copy of the pattern stapled together so I can just flip the pages as I work through the steps.

This is the finished quilt top. This is a queen size bed. The 24 inch blocks are centered on the bed. You get a sense of just how big this thing is.
The fabric she chose is Mill Creek Garden by Jan Patek. It a a beautiful collection of purples, greens, brown and cream. I had her pair up the fat quarters the way she wanted me to sew them. This way, the designing of the quilt could be hers. It worked beautifully.
It took me several weeks to get all the blocks made. I didn't want to rush it, and it was hard some days to stay on track. I truly think this will be the last quilt of this size I will ever make. I am just getting too old to struggle with that much fabric. It is tough. But I am glad I did this and can't wait to see it quilted.
I sent her to the local quilt shop to get recommendations for long arm quilters. I have found that that is the best way to locate one. They gave her 6 business cards and she sent out emails to 4 of them. She has chosen one and we will go meet with her tomorrow at the quilt shop. I have explained about batting and backing, and this quilter can provide both, which makes my job easier too. The only thing I will still have to do is to bind the quilt when it comes back from the quilter. I am hoping that when it is fully finished, I can get a full photo of the quilt to share here with y'all. Until then, have a lovely day.


Saturday, December 21, 2013

What My Spools Quilt Taught Me

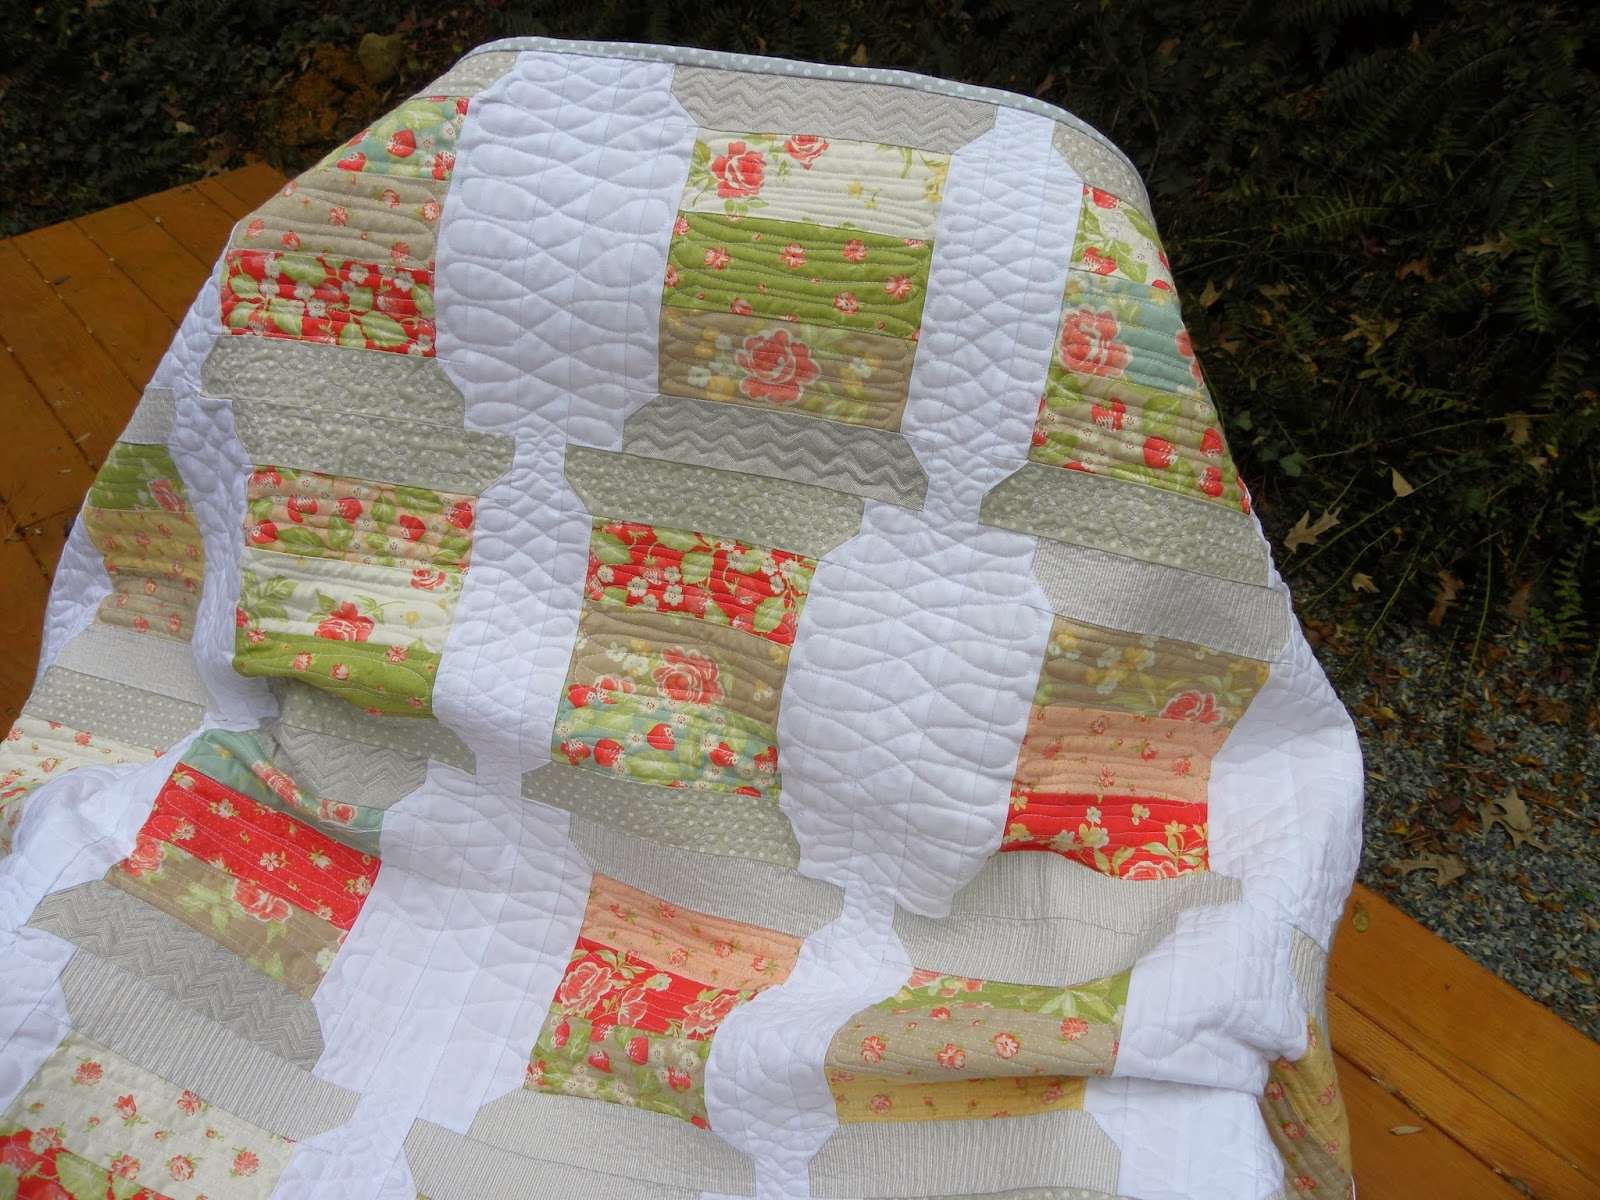
I love this quilt, so much more now that it is done, as is so often the case. It took me a long time to finish it, and there was a lot of learning along the way, so that is what I want to share here today. If you are like me, you often admire quilts made by others and think "I would love to make one of those." But seldom do I act on that thought for a couple of reasons. I can't always find the same fabrics or the pattern is complex and I am not one who does complex very often. Or, more likely, I just want to admire it...a lot...but not really actually make it. The Spools pattern grabbed me. The biggest reason I went ahead and bought it, other than the fact that I do love so many of Camille's patterns, is the wobbly way the spools are stacked. It is very different from most spool quilts.

 I bought the pattern on March 17th of this year. Funny, when I checked on that, I thought it had been much longer ago. I didn't have the fabrics Camille used, but what I did have was a fat eighth bundle of Strawberry Fields by Fig Tree. I bought the fat eighth, the only bundle of that size I have ever purchased, because I just needed to have more than a charm pack of those soft, beautiful designs.
 I spent one session cutting out all the pieces for this quilt. I have never done that before. I tend to cut and sew and cut and sew as I go. I was determined to do this in a different way. I bought a plastic project storage container and kept all the parts in there as I made the blocks over time.  I think it was late summer or early fall when I finally had this quilt top finished.  So far, so good. I was pleased with the look of my work.  Now, to quilt it.
 My first thought was to shortcut it and do a loopy doodle all over it and have it done.  But having recently finished quilting a special quilt for my sister which involved 16 hours of quilting (I kept track) I started to think about doing more for my spools.
 I used the patterns on the grey spool ends to inspire me and quilted lines, zigzags and a scribble on the dotted ones, filling them in pretty densely. For the spools themselves, I quilted an oval loop around from top to bottom to imitate the way thread is wound around a spool. It is less dense than the grey areas.
 For the white background, I chose to quilt a figure 8 that ran from top to bottom. I found that I could expand and contract it pretty easily as the white area expanded and contracted.  When it was done, the lesson from the quilting became "less dense quilting comes to the foreground, while more dense quilting recedes to the background". I am sure this is not a new concept, but I didn't think of it before I quilted this.
 Another lesson I learned is about thread. While I was making this quilt and quilting it, I was short on funds and ran low on white thread. I have been sewing with Aurifil for a couple of years now, almost exclusively. It works well with my Bernina. While I did not go buy a cheap thread, I did buy a less expensive thread. I used some Mettler which I had and some Gutermann that I got at Joann with a coupon.
 All threads are not created equal and all machines do not sew well with all threads.  My stitches are uneven and I fought with my machine a bit, but I did manage to finish this quilt. I learned my lesson. If it's worth doing, it's worth doing right, including the supplies.
 The last lesson is that washing and drying, which shrinks and provides the crinkles we love so much does help to equalize the dense and not so dense quilting.  It does look better now.
I love this quilt and I am so glad I followed my heart and made it. I hope to keep the lessons learned in the front of my mind when next I start a project, but this I know about me: I am a hard headed person and I will need to re-learn some of these lessons next time I decide to take a shortcut.  Have a great day and I will talk to you soon.

Monday, November 18, 2013

Derailed

Have you ever been derailed in your plans? I'm sure you have. Happens to everyone. I was planning on getting this quilt completely finished last week.

I was quilting along. I was in the zone. It was going great...until I ran out of white thread. Really. White thread. Who doesn't have tons of white thread? Me, apparently. I had no spare time and no spare cash last week, so I pushed this aside and tried to move on to other things.  Yesterday I went to Joann and bought some white thread. I came home and loaded my bobbin and started to sew. Wasn't feeling it. Quit. This morning, again, started quilting, made it through a couple of spools and quit. I have been wandering around, trying to motivate my sewing muse. No deal.  So I cleaned instead. Sometimes my muse won't work if things get too cluttered and messy. So that's done....

 And then I got distracted by these. I pulled from my big stash of charms, greens and blues and put them on the wall. I love the way they look.  This is 7 x 7 but I cropped it to see if I liked the yellow and blue for a border...
 ...or the orange and yellow. Still haven't decided. Anyone have an opinion they'd be willing to share?
 I also pulled a stack of Christmas fabrics for inspiration and started cutting pieces for some ornaments and other sewing gifts.  Hopefully if they are all cut, assembly will happen soon.  Still have that Spools quilt to deal with, remember?
And this little stack has been sitting there mocking me for months. These little white pieces are from my Rainbow Retro Flowers quilt. I keep thinking there's gotta be a cool use for them, but I haven't found it yet. I was thinking raw edge stitching them onto some colorful fabric. I need inspiration or ideas here. Hopefully soon.  Hope you have a great week. Talk to you soon.

Wednesday, November 13, 2013

WIP Wednesday

I am still quilting every chance I get, trying like crazy to finish up some of those quilt tops I have lying around. Much progress is being made.  Here is today's installment.

 I am quilting my Spools quilt. This is a quilt pattern by Camille Roskelly. I fell in love with it when I saw it. The stacked off-set spools are so cute and just a bit different from most spool quilts.
 This one is getting quite a bit of quilting, as seems to be what my quilts are crying out for these days.
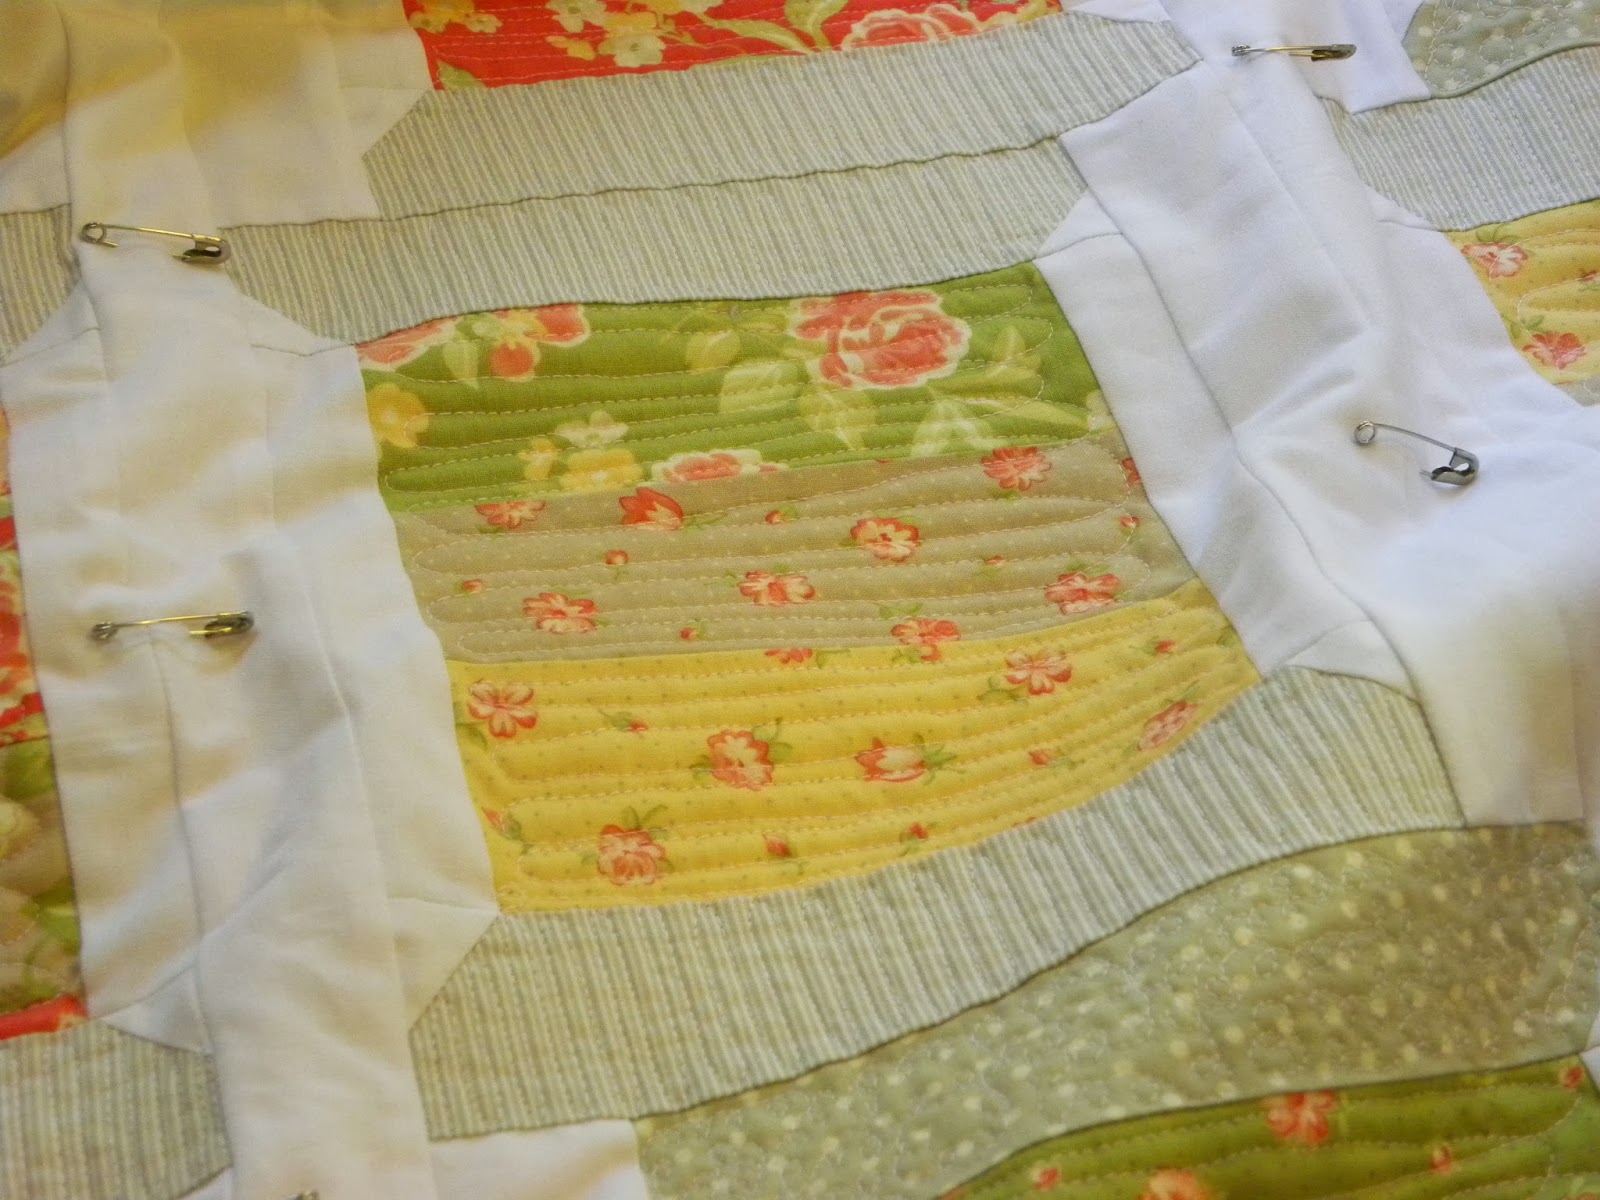
 I am doing a swirl around the main spool part, to imitate thread. The ends of the spools are getting quilted base on the fabric in them. Small stripes for this one...
      ...and round doodles for the one with the polka dots.  I am loving this quilt already.
The white sashing is going to be figure 8s. I am about half way done with this baby and hopefully I can have it done in about another week. The fabric I used was a fat eighth of Fig Tree's Strawberry Fields.
Linking up with Lee at Freshly Pieced for WIP Wednesday.

Tuesday, February 12, 2013

A Tale That Will Make You Swoon

Let's go back in time, shall we?  About a year ago, Katy, at I'm a Ginger Monkey was hosting a Swoon Along for all interested quilters to make Camille's Swoon quilt pattern.  I loved it and bought the pattern and made my first block.  Challenging, but not too tough.  Okay, I can do this.

I did some quick calculating and decided that if I only did one block a week, in nine weeks they would be done.  Yeah...that so didn't happen.  I don't know how long it took, but I did finally get it all put together.  Then, I had to stop for Christmas sewing.  Yes, that's right 11 months later.

January I bought batting and pin basted.  I had decided to quilt it myself.  What was I thinking???  I was thinking I couldn't afford to send it out, even if it was 91 inches square.  So this is what I did to set up:

 I got a pair of gloves.  These came from the Traveling Stash box.  I have never used gloves before, but you can bet I am a fan of them now.  And yes, this poor little Bernina is what I quilted on.
 It slides on my desk, so I put pieces of foam cabinet liner under the four feet.  Worked like a charm.
 I had to duct tape the extended top in place.  It's the one thing that isn't made very well on the Bernina.  The plastic "clips" that held it in place broke off a long time back.  If you are doing any free motion quilting, it moves and falls off.  Bad news!
And I put on my knee pedal to lift the presser foot so my hands would be free to wrestle the quilt.  There is the roll of duct tape down there.

So I began...I cursed...out loud...a lot.  This was harder than hard.  I had to make myself go in there and work on it to keep moving forward.  I think it took me 3 1/2 weeks.  Finally, Sunday last, it was done.

 Here is the binding, all pressed and ready to sew...I had no fabric for the binding, so I went on Etsy and found the checked red from the Reunion line which I thought was just perfect.

 This is how I wind it to attach it.  I put it on an empty spool and let it feed off of that.  I don't use pins. Gasp!!

 And here it is in all its Swooning glory.  Quilted, bound, washed and crinkled.  It is so soft and nice.


 Here is the back. I decided to use big blocks of the rest of the fabric line and I am so glad I did.  I love the way it looks.
                            See how nice the red checks are as a binding?
 This is my last label from the first set I bought over a year ago.  I just ordered some more and I changed it just a wee bit to a script font.
 If you look where the grey and the green meet you can see some of my quilting stitches that are not very in the ditch.  That happened a lot when I was trying to subdue the quilt to pass it under the needle.
I quilted around each star and a bit of straight line quilting coming from the corners.  Very minimal, but about all I could manage.  Will I ever do this again?  Nope, nada,  nunca, huh uh!!!  But I do love my Swoon Quilt!  Thanks for reading this far.
Talk to you again soon.


Thursday, September 20, 2012

The Best Quilting Day!!

This is going to be a picture heavy post, but I am so stoked!  I finished TWO quilts today and I decided that rather than do two separate posts, I'm going to do one big one.  I have been working on these for awhile now and, well, lets look at them, shall we?

First let's look at this one.  I borrowed the idea from Camille this summer.  I only wanted to make a small lap quilt.  I really just wanted to use the Summersville jelly roll I had.  This was perfect.

 I decided to bite the bullet and try my hand at bias binding.  I have been too afraid to try until now.  What was I afraid of?  I thought it would take lots longer and I am lazy when it comes to a longer process for anything.
 This is how my binding would have looked if cut on the grain.  Plain and boring, right?
 This is how it turned out.  Soooo cool, am I right?  I used Amanda Jean's tutorial for bias binding.
                                       Here we go...

                             Love the way this looks.
                         Here is a bit of the back with the binding sewn in place.

 I had quite a bit left.  I didn't measure, I just made a bunch because is was so easy.  I will use this later on something else.  I have a few more strips I can add if I need to.
 A close up, fresh from the dryer.  I hope you can see the zigzag quilting pattern I used.
                                         One last shot!

                                 The inspector...doing his thing.
 Now for my favorite Quilt!!  This first picture isn't great, but I kept it to show the chevron quilting pattern on this quilt.  I felt like all those dots needed a linear quilting.  After doing the other quilt above, I knew this was what I wanted on this quilt.  I did half of it and then my husband suggested reversing the points to point in the opposite direction toward the faded dots.  Perfect.
 I used the black/grey Ombre Dots for the binding, which is not bias because I didn't want to lose that fade to grey look.
How cool is this little quilt?  And I still have lots of Ombre Dots left to use in other projects.

Have a great rest of the week.