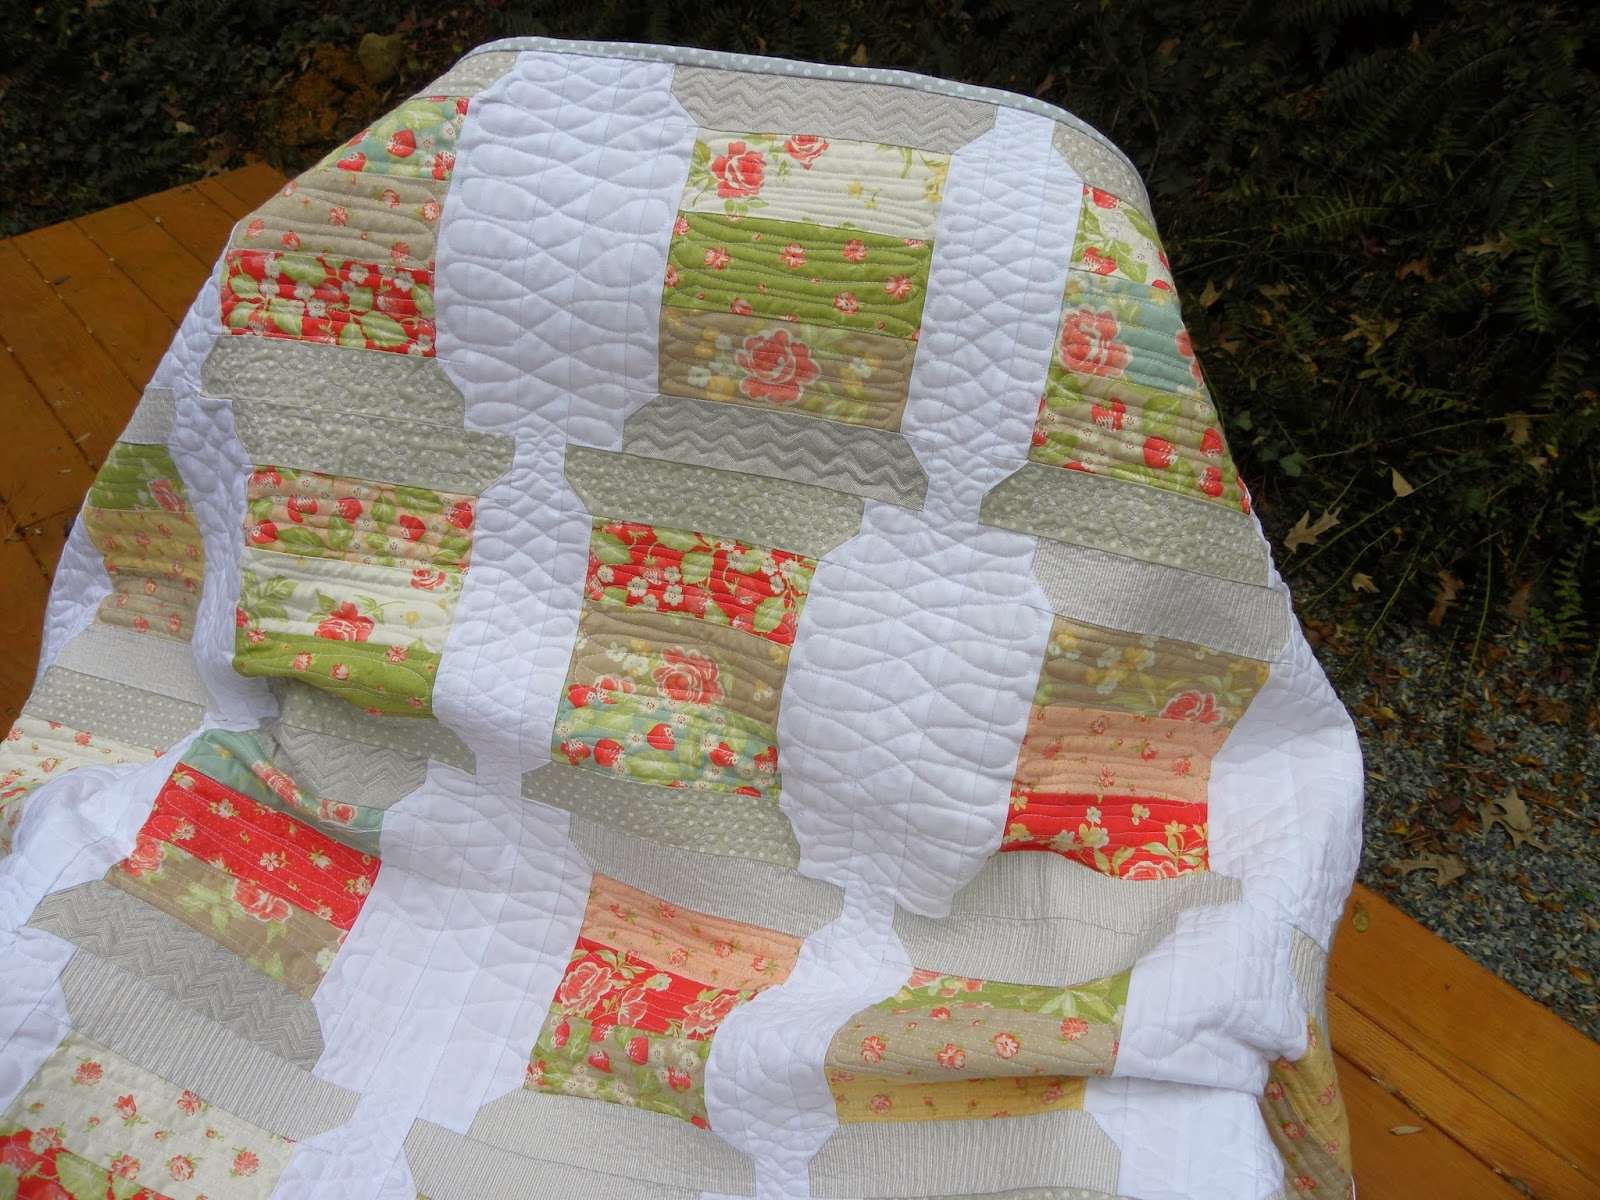
I love this quilt, so much more now that it is done, as is so often the case. It took me a long time to finish it, and there was a lot of learning along the way, so that is what I want to share here today. If you are like me, you often admire quilts made by others and think "I would love to make one of those." But seldom do I act on that thought for a couple of reasons. I can't always find the same fabrics or the pattern is complex and I am not one who does complex very often. Or, more likely, I just want to admire it...a lot...but not really actually make it. The Spools pattern grabbed me. The biggest reason I went ahead and bought it, other than the fact that I do love so many of Camille's patterns, is the wobbly way the spools are stacked. It is very different from most spool quilts.

I bought the pattern on March 17th of this year. Funny, when I checked on that, I thought it had been much longer ago. I didn't have the fabrics Camille used, but what I did have was a fat eighth bundle of Strawberry Fields by Fig Tree. I bought the fat eighth, the only bundle of that size I have ever purchased, because I just needed to have more than a charm pack of those soft, beautiful designs.
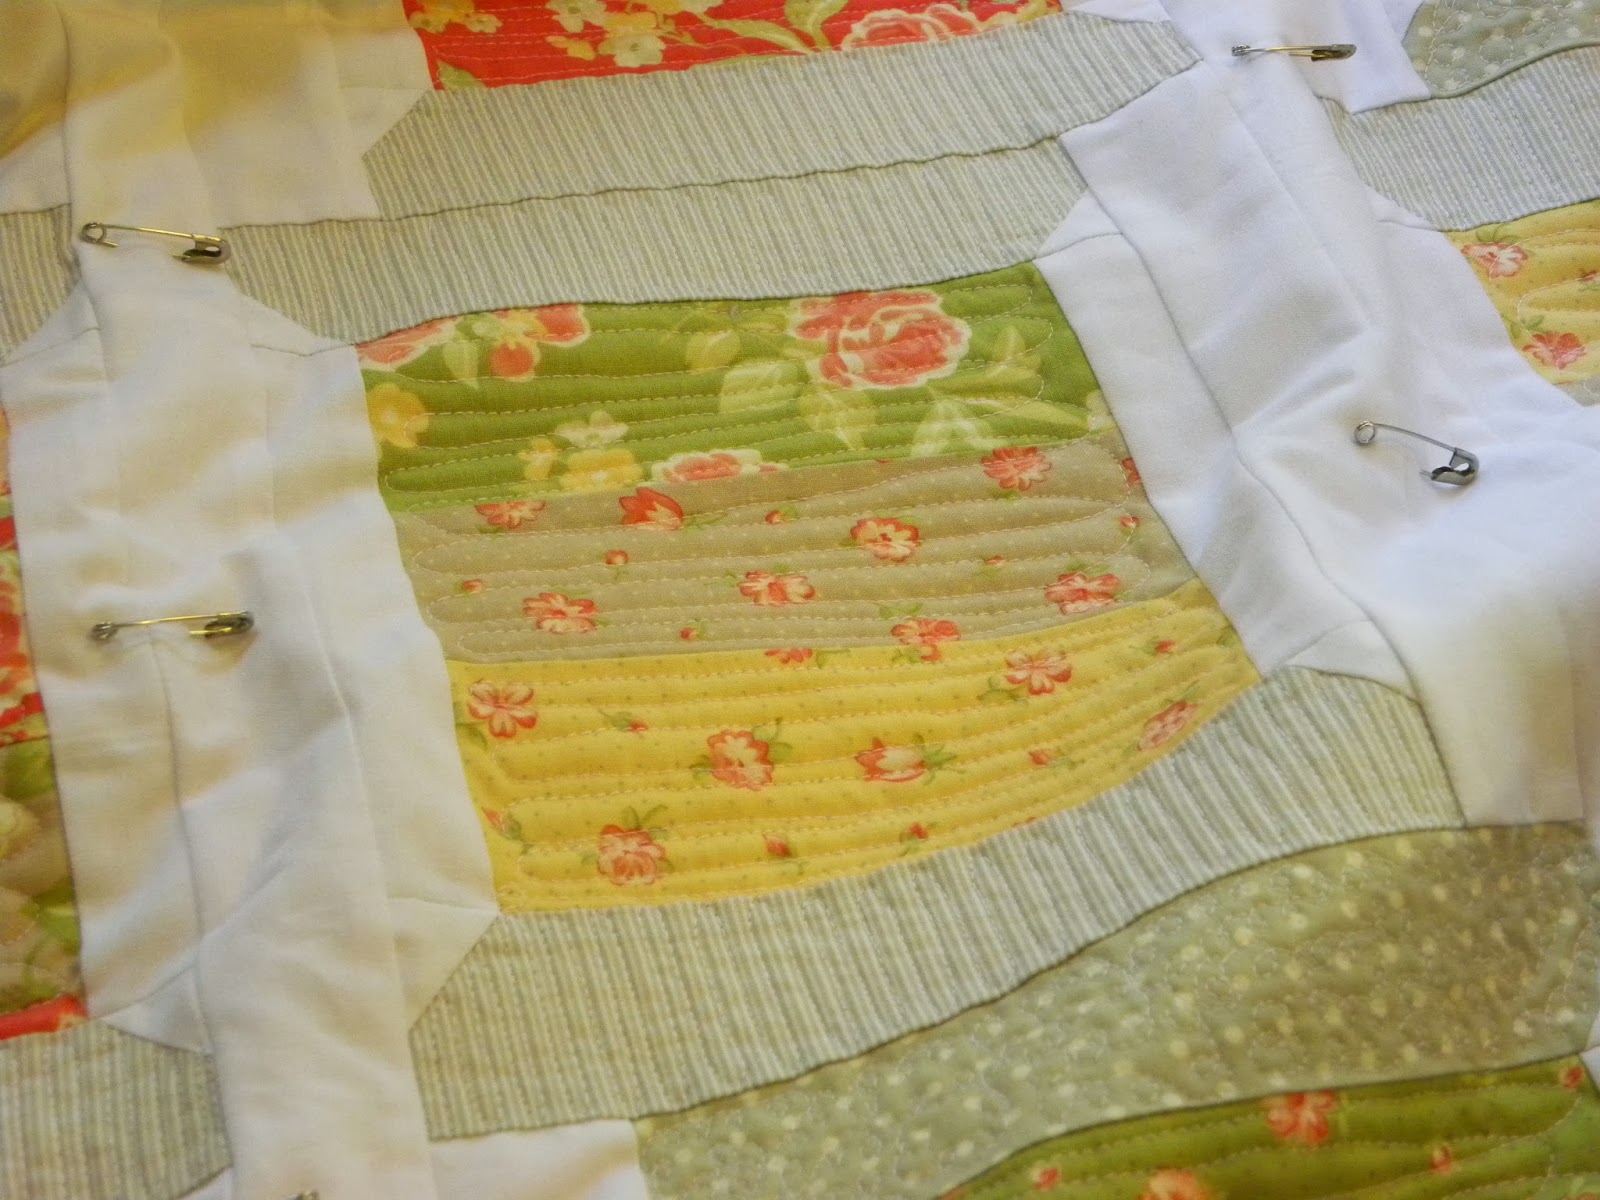
I spent one session cutting out all the pieces for this quilt. I have never done that before. I tend to cut and sew and cut and sew as I go. I was determined to do this in a different way. I bought a plastic project storage container and kept all the parts in there as I made the blocks over time. I think it was late summer or early fall when I finally had this quilt top finished. So far, so good. I was pleased with the look of my work. Now, to quilt it.
My first thought was to shortcut it and do a loopy doodle all over it and have it done. But having recently finished quilting a special quilt for my sister which involved 16 hours of quilting (I kept track) I started to think about doing more for my spools.
I used the patterns on the grey spool ends to inspire me and quilted lines, zigzags and a scribble on the dotted ones, filling them in pretty densely. For the spools themselves, I quilted an oval loop around from top to bottom to imitate the way thread is wound around a spool. It is less dense than the grey areas.
For the white background, I chose to quilt a figure 8 that ran from top to bottom. I found that I could expand and contract it pretty easily as the white area expanded and contracted. When it was done, the lesson from the quilting became "less dense quilting comes to the foreground, while more dense quilting recedes to the background". I am sure this is not a new concept, but I didn't think of it before I quilted this.
Another lesson I learned is about thread. While I was making this quilt and quilting it, I was short on funds and ran low on white thread. I have been sewing with Aurifil for a couple of years now, almost exclusively. It works well with my Bernina. While I did not go buy a cheap thread, I did buy a less expensive thread. I used some Mettler which I had and some Gutermann that I got at Joann with a coupon.
All threads are not created equal and all machines do not sew well with all threads. My stitches are uneven and I fought with my machine a bit, but I did manage to finish this quilt. I learned my lesson. If it's worth doing, it's worth doing right, including the supplies.
The last lesson is that washing and drying, which shrinks and provides the crinkles we love so much does help to equalize the dense and not so dense quilting. It does look better now.
I love this quilt and I am so glad I followed my heart and made it. I hope to keep the lessons learned in the front of my mind when next I start a project, but this I know about me: I am a hard headed person and I will need to re-learn some of these lessons next time I decide to take a shortcut. Have a great day and I will talk to you soon.